I have been teaching now for more than five years and still find that many people do struggle with putting binding onto their quilts – a lot has been written on many websites and many books and here is my contribution on the subject, maybe you’ll find one or two tricks you didn’t know:
Preparing the quilt
After you finish quilting, take a little time to prepare the quilt for the binding:
- Unless you have quilted to the edge, it is advisable to baste the edge with pins or tacking. (It’s much easier to sew the binding to “one quilt” rather than “three layers”.
- Trim the excess backing and wadding with rotary cutter making sure all the corners are square.
Preparing the binding strip:
- When you bind straight edge you can cut along the straight grain of the fabric. Bias binding is cut on the bias and is most common on quilts with scalloped or curved edges.
- For single binding you cut the strip 1 ¼” wide
- For double binding you cut the strip 2 ¼” wide
- To determine the length of binding required, measure around the perimeter of the quilt and add 10”
Joining the binding strips
- Binding needs to be in one continuous strip, so you will most likely need to join several strips together.
- Diagonal joining distributes the bulk of the seams as they go over and around the edges of the quilt.
- Here is how to join it on diagonal:
- Place the end of one strip horizontally in front of you right side up and place the end of another strip vertically across right side down. Overlap them just a fraction (Fig 1)
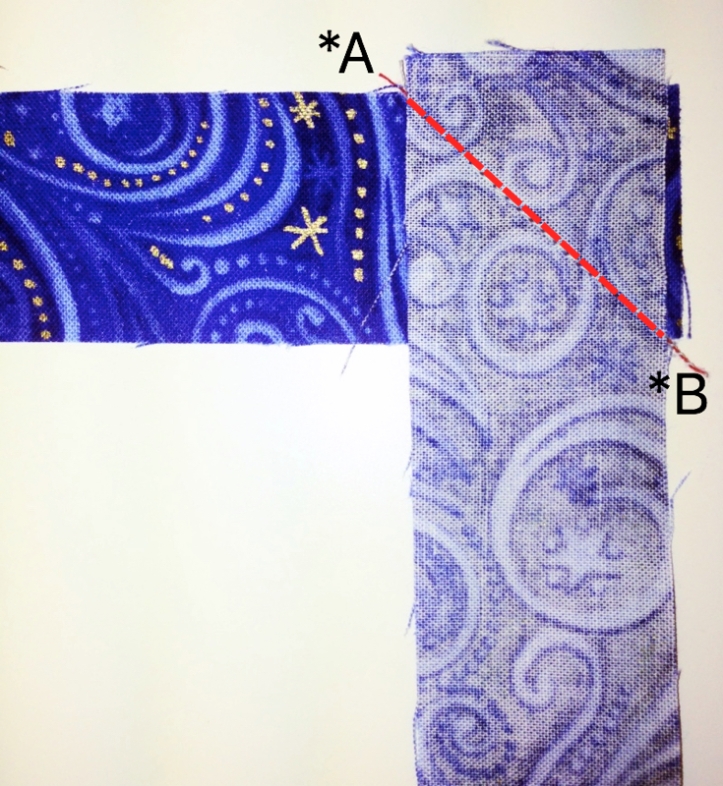
Fig 1 - Imagine this to be a corner of a picture frame and draw a diagonal line as if you were to cut the corner of the frame. Draw a line from the point where the strips cross over on top left *A all the way down to the same crossing spot on the bottom right *B (Fig 1)
- Pin together and sew exactly on the line. Starting and finishing at the cross sections marked with stars is very important!
- Once sewn trim the excess fabric, leaving ¼” wide seam allowance. Press the seams open to distribute the bulk.
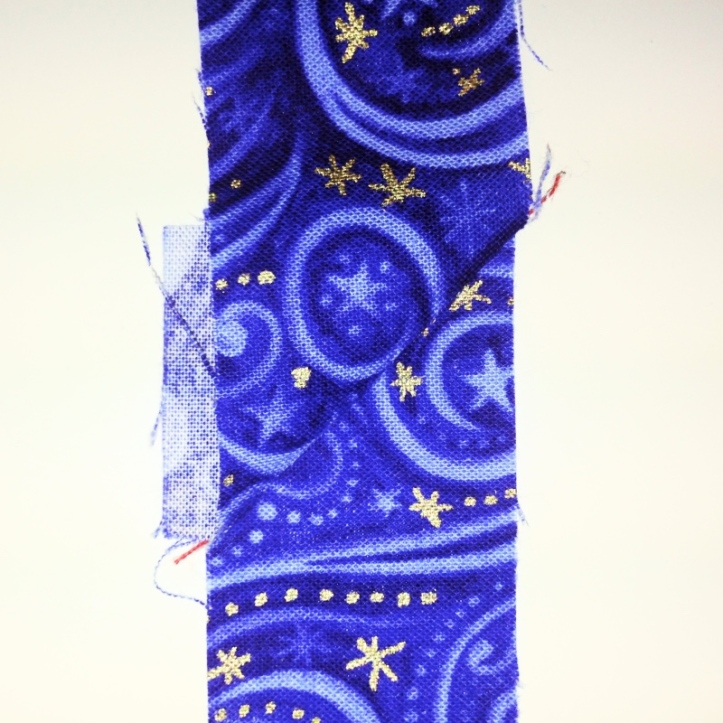
Fig 2 - Continue adding strips the same way until you have enough binding to go around the quilt, plus 10”.
Sewing binding to your quilt
- For single binding you will add the strip as it is.
- For double binding fold the binding strip in half lengthwise, wrong sides together, and press to keep in place.
- Do not start attaching the binding in a corner. It’s much easier to fold a mitre at the corner than to sew it there! Also avoid the middle of the sides; if you start there, each time you fold the quilt in half it will weaken this spot.
- It’s best to start approximately 10” from one of the corners.
- You will sew the binding to the top of the quilt and roll it to the back where it will be attach by hand or machine in the last step.
1. Place the binding strip on top of the quilt and line up the cut edges of the binding strip to the cut edges of the quilt.
2. Do not pin the binding to the quilt – as you are sewing through lots of layers the binding has a tendency to move and you would have to re-pin it and you also need the ends free for mitering the corners.
3. Start sewing 4” from the beginning of the binding strip; use a ¼” seam allowance (Fig3).
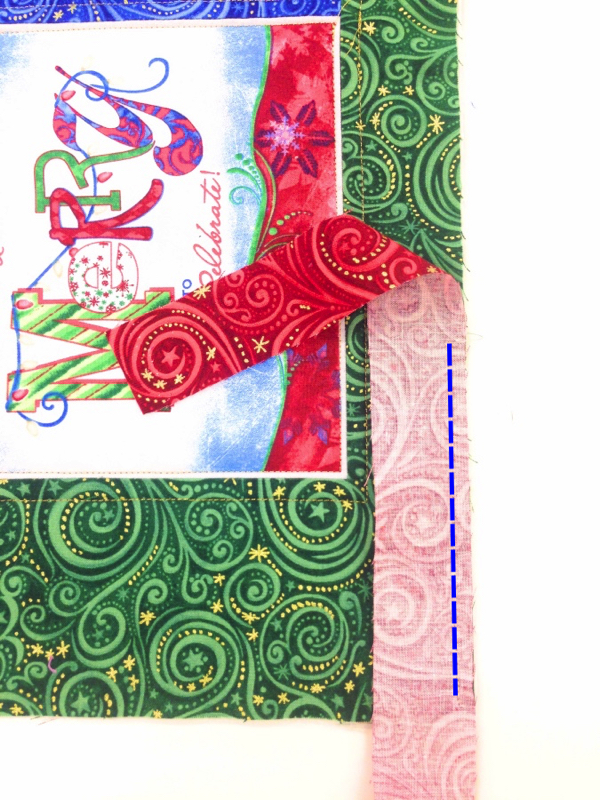
4. As you sew, concentrate on the three inches of binding directly in front of the needle; lay these three inches in position and sew; then go to the next three inches.
Mitring the corners
Mitred corners give a professional finish to your binding. If they make you nervous, relax – there are only four of them and you will be an expert by the last one.
1. As you approach your first corner stop stitching ¼” from the edge of the quilt and do a backstitch. Take the work from under the sewing machine.
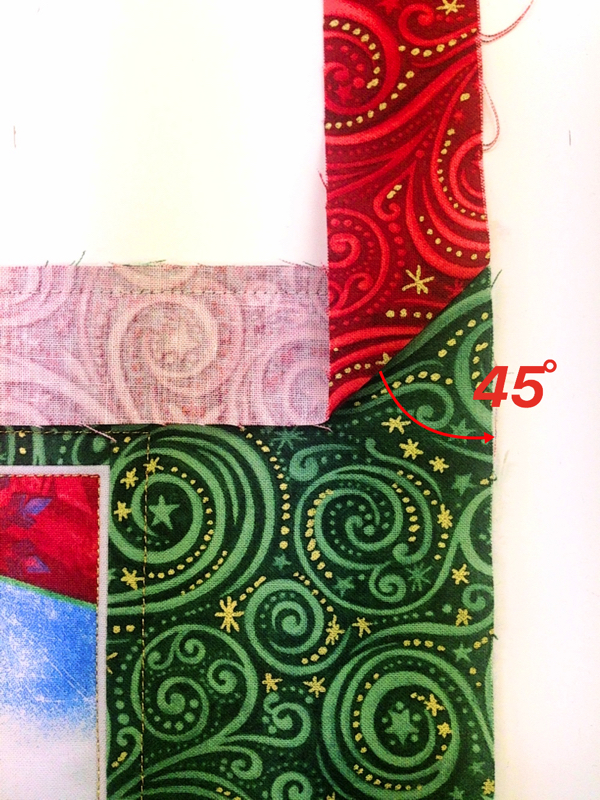
2. Place the corner to have the side you want to stitch next vertically in front of you. Take the binding strip and flip it up (Fig 4) The fold will sit on the 45º angle of the corner and will create the mitre.
3. Fold the binding down and align with the edge you will now sew (Fig 5). The fold should be even with the first (upper) edge. Use a pins to hold the fold in place if you need to place under sewing machine.

4. Start sewing right from the top edge of the corner until you reach the next corner.
5. Repeat for the remaining corners.
When approaching the beginning of the binding strip, stop sewing leaving about 6” gap between the two ends.
Connecting the ends
There is different way to join the ends for single binding as for the double binding.
Single binding:
- Place the quilt onto a flat surface; flatten one end along the edge of the quilt and in the middle of the unsewn part fold the strip 45º angle up and crease with your finger. Flatten the other end and fold it 45º angle down right next to the fold of the other end and crease. Leave a tiny 1mm gap between them (Fig 6) – the binding strip always stretches a bit so this gap makes it perfect length.

Fig 6 - Fold the quilt in the middle of the gap and pin together – this way the quilt will not be pulling the ends of the binding as you’re sewing them together (Fig 7).
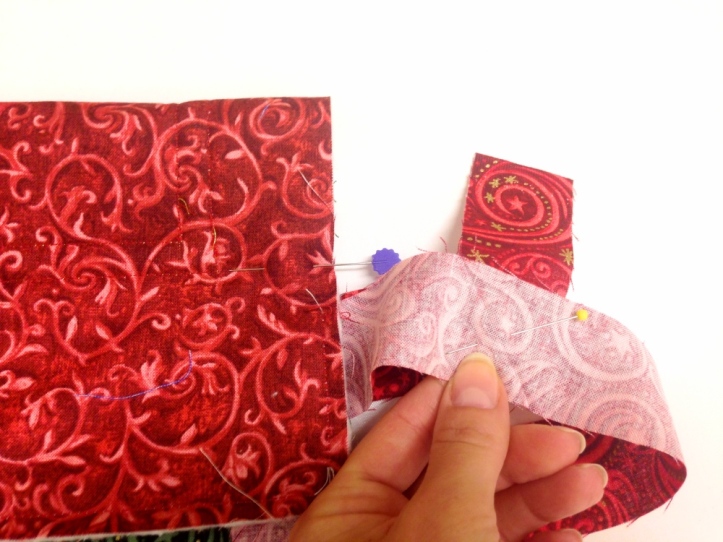
Fig 7 - Keeping in mind how you’ve joined the strips together on bias, place the strips one on the top of each other – one horizontal the other vertical right sides together – the creases will sit on top of each other and you will sew on top of them.
- Before trimming any excess off, first check your calculation was right and the strip is the right length – unpin the quilt and flatten the binding, if it’s not too short or too long trim the edges leaving ¼” wide seam allowance.(Fig 8) Press the seams open to distribute the bulk.

Fig 8 - Sew the binding in place.
Double binding:
- Place the quilt onto a flat surface; flatten one end along the edge of the quilt and flatten the other end on the top of it.
- Place a pin into the fold of each strip, exactly at same spot as they sit on top of each other (Fig 9a and 9b)
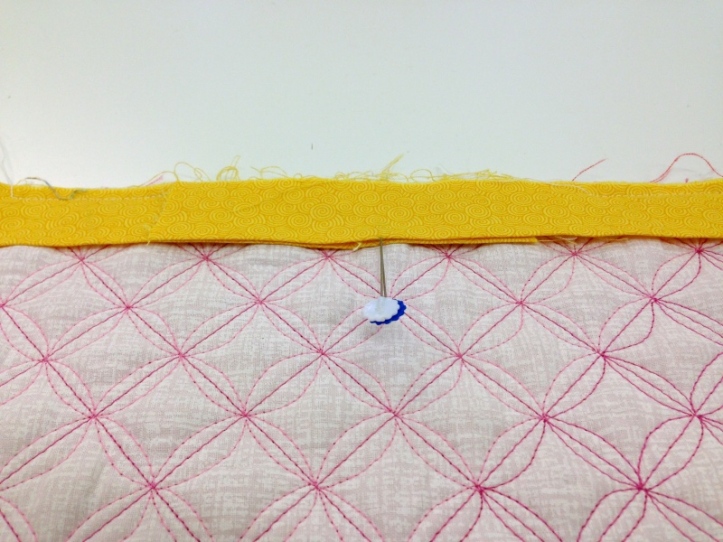
Fig 9a 
Fig 9b - Fold the quilt in the middle of the gap and pin together – this way the quilt will not be pulling the ends of the binding as you’re sewing them together.
- Open the fold of one strip and place the pin properly making x together with the crease line. Repeat on the other strip (Fig 10).
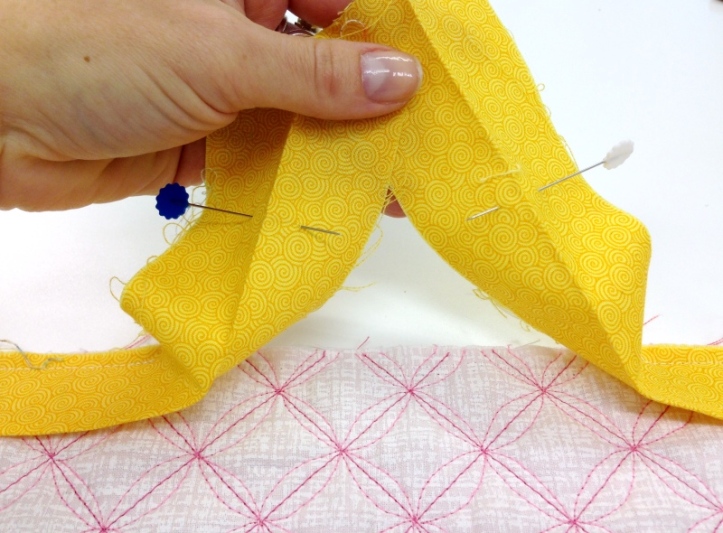
Fig 10 - Keeping in mind how you’ve joined the strips together on bias, place the strips one on the top of each other – one horizontal the other vertical right sides together – the crease of one strip will sit on the pin of the other strip (Fig 11).

Fig 11 - Now you want to imagine this cross of the strips to be a corner of a frame and you will mark the diagonal line which will cut off the corner of the frame (Fig 12)
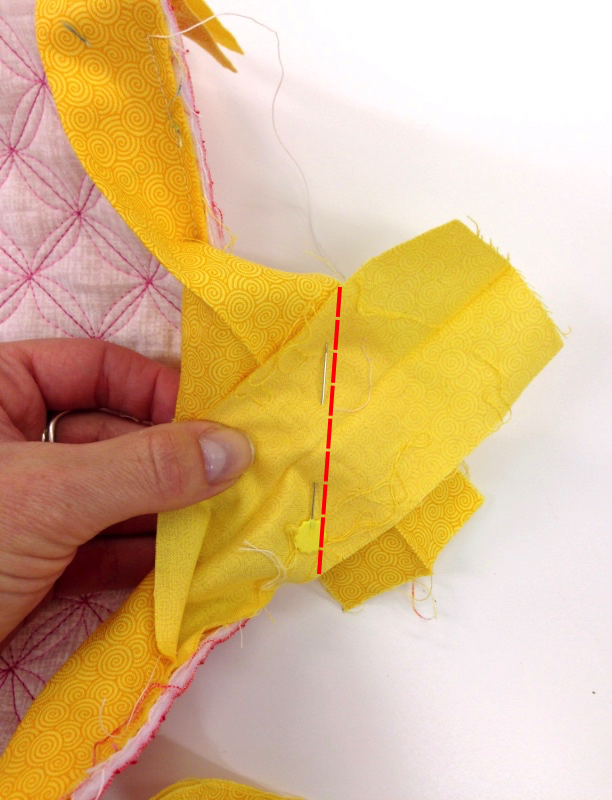
Fig 12 - Pin together and sew exactly on the line. Starting and finishing at the cross sections marked with stars is very important!
- Before trimming any excess of first check your calculation was right and the strip is the right length – unpin the quilt and flatten the binding, if it’s not too short or too long trim the edges leaving ¼” wide seam allowance. Press the seams open to distribute the bulk (Fig 13).
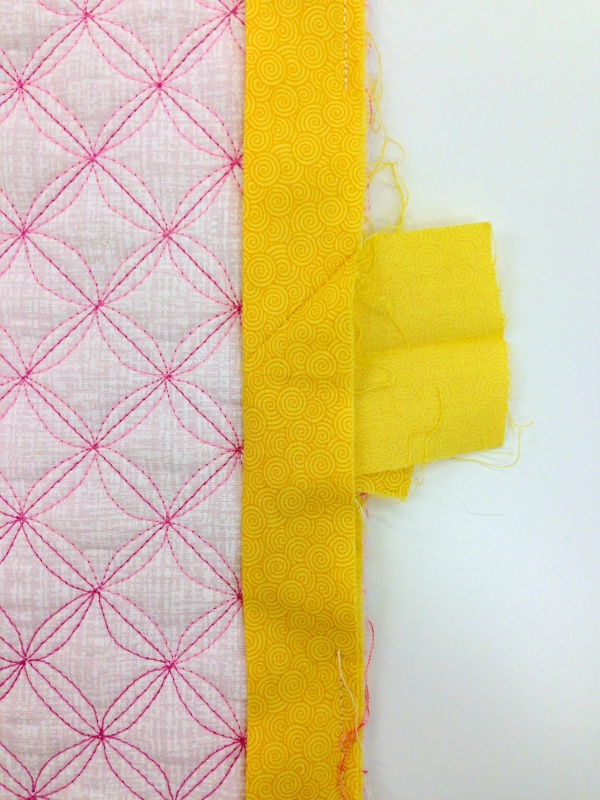
Fig 13 - Sew the binding in place.
Finishing the edge
To finish the edge you will need to bring the edge of the binding to the back of the quilt where you will secure it by hand or by machine.
- For single binding fold ¼” of the raw edge in and crease with your fingers – as you fold it over to the back of the quilt it needs to cover the machine stitch. For double binding you just fold the whole binding strip to the back, as it has been previously folded in half there is no need for extra folding. If the double binding doesn’t cover your stitching you have stitch too far and have to unpick and sew the binding again with smaller seam allowance. Next step is the same for both bindings.
- When you reach a corner – fold over the binding on one side of the corner and flatten it until the end and it will naturally make 45º angle (Fig 14) then fold the binding on the other edge, this will create a mitered corner (Fig 15).

Fig 14 
Fig 15 - To sew the binding on machine it’s best to tack it to keep it in place for machine sewing. Once tacked all around or at least around the corners, sew in the ditch from the front using thread in the bobbin matching the colour of the binding.
- To sew the binding by hand you need thread matching the colour of the binding in the needle and using invisible stitch bring the folded edge of the binding to quilt back so that it covers machine stitching.

Hope all this helps and please leave me a comment how did you get on with it and if it was helpful.
Happy sewing
Vendulka


I love your photos, really clear. It must have taken you ages.
LikeLike
Thank you! Not to bad thanks to Apple technologies 🙂
LikeLike
Congratulations. I certainly will be revising it using your instructions. I have found it difficult to do properly. Glad that all is going well for you. We miss you ! Carys
LikeLike
[…] wadding and backing and attach the binding. If you’ve never done binding you can find my free tutorial on bindings here. You will also need to attach a hanging sleeve or some other way to hang it on the wall. I’ll […]
LikeLike
Lovely clear instructions thank you.
LikeLike
Thank you Irene, I didn’t even have it proof read by anybody, so I’m glad you find it helpful!
LikeLike